
AGE GUIDE: 8-12 years // LEVEL: Difficult // TIME GUIDE: 1 hour

Why are they called 'Love Balloons'?? I can't really say, apart from it adds to their cuteness?!
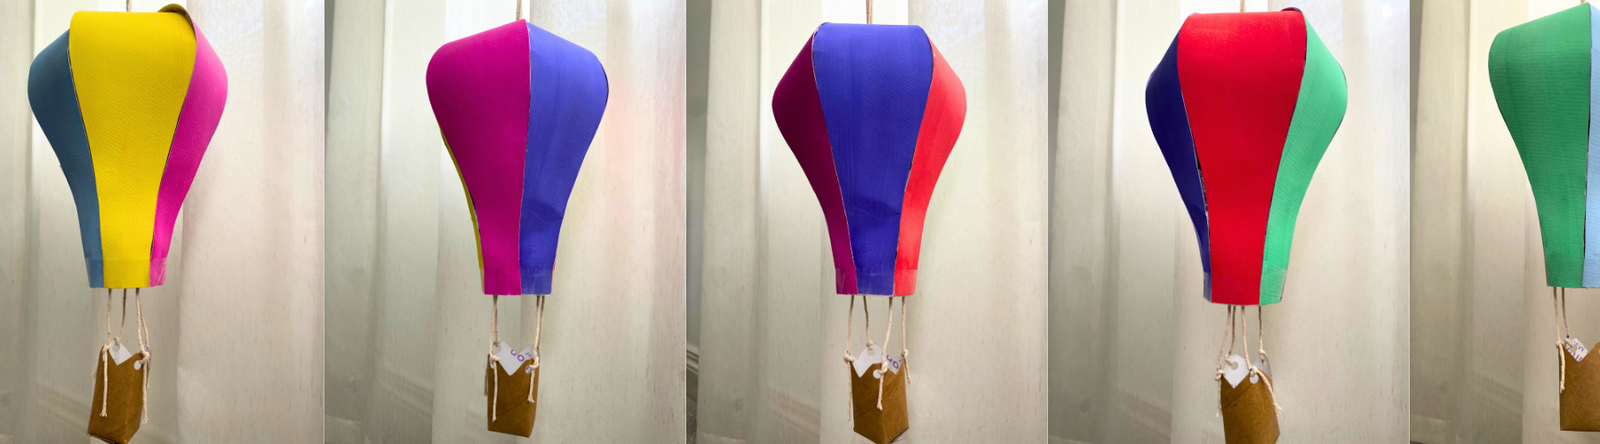
How do you make them? Well, now that I can answer! Check out the step-by-step guide to make these fun paper hot air balloons - another piece of evidence that craft involving toilet rolls is cool again. As if we needed more proof!
What You'll Need
- Painted paper (we used our gorgeous All The Colours art pad and painted 6 colours - see below) OR A4-sized coloured paper
- The bottom of a paper cup (we used a takeaway coffee cup)
- Scissors
- Glue stick
- Sticky tape
- String - cut into four pieces of 50cm, with a knot 15cm from the bottom of each strand
- A toilet roll
- Patience - if you're doing this with early schoolers they will need your help when it comes time for sticking

Up, Up and Away!
Step 1: Trace and Cut
Take a spare piece of paper and cut it into long petal shape, just like the image below. To ensure the curve is the same on both sides, draw one side of the curve, fold the paper in half lengthways and cut following the drawn line. This way both sides will be a mirror of each other. Unfold so that the petal shape is flat, and use this template to stencil the same shape to your six colour sheets. The size is up to you, but remember, you need to measure the circumference at the base of your paper cup to work out how wide the paper needs to be at the bottom of your petal (circumference divided by six petals). Cut all petals out.
Step 2: Set Up the Frame
Cut the bottom off the paper cup, leaving about 1-2cm of the cup wall in place. Then cut a small circle out of the centre of of the cup base. Piece four holes at even intervals (with a skewer or similar) on the remaining cup base. Then thread your string through each hole so that the 15cm section of string is at the bottom of the cup base.
Step 3: Glue and Secure
Coat the outside of the paper cup with glue, and then work your way around the diameter of the cup, sticking the smallest point of the petals all the way around until you can no long see any cup. You can add a long piece of sticky tape around the base for extra stick if you need. Then, work your way around the inside of the forming balloon, and slowly stick each piece of petal to it's neighbour, following the edged of both pieces. We found it much easier to use lots of small pieces of tape, connecting one petal at a times as we worked our way to the top. You will have an opening at the top when you've finished sticking the balloon together - don't worry, this is as it should be!
Step 4: Attach the Basket
Bend the toilet roll gentle until the shape resembles a square. Then cut a 2cm slit on each corner at one end, before folding up and securing with tape - just like wrapping a present. Next, on the other end cut around 1/3 of your toilet roll off - to give it a more basket-like shape. Use a hole punch or skewer to make four holes at even intervals on this end. Then tie the bottom 15cm of string (hanging out the bottom of your balloon) to each of these holes. You're balloon is now connected to your basket! Woohoo.

Step 5: String it Up
Cut a circular piece of paper big enough to cover the hole that remains at the top of your balloon, and piece a hole in the centre (or use a hole punch). Thread the four long pieces of string through this hole and then stick it with glue to the top of your balloon. Simply tie off the top of these strings together so you can hang the balloon from the top.

Step 6: Let it Fly!
Let the love take flight! Your balloon is done - and gorgeous no doubt! Hang them up and marvel at how clever your little one is.
xx Brooke